|
 |
|
![]()
![]()
by Alan Townsend of the Chelmsford Marquetry Group
Having worked in the veneer preparing industry for many years, there are little tips and techniques that I have come to take for granted. Many of them I have picked up from those who taught me when I started out. I surprise myself sometimes just how much geometry I use during the course of my Marquetry and woodwork and little did my teachers at school suspect that one day I would rely on mathematics to be artistic! The mathematical gurus and purists out there will have to shut their eyes to this technique which is a compromise with simple tools to achieve a striking effect that beginners in Marquetry can have a go at and produce very acceptable results. Judge for yourself. (The pictures will be loading as you start reading.) If you wish to print out this project, set your page layout and printer to LANDSCAPE. |
||
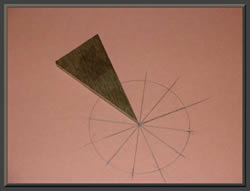
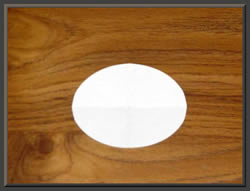
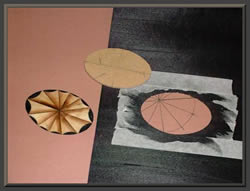
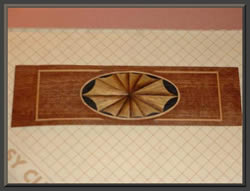 This is your objective |
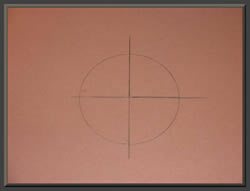 With a compass draw a circle (size is not important) and divide accurately into quarters. A set square is the best way to get the right angle in the centre. |
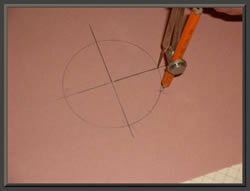 Using trial and error, divide the quarter segment into three EQUAL divisions. |
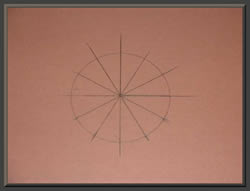 Join up the marks as shown. |
 Make a template from one segment. You can use stiff cardboard but thin wood or plastic will be more durable. You could of course make a 30 degree equilateral triangle template by any other method. |
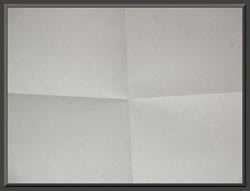 Now take a piece of paper and fold it into four and then open it out again. |
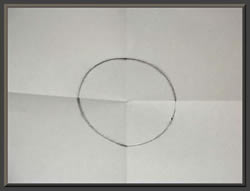 Using your compass, draw a circle around the centre crease, the diameter being the long measurement of your finished oval. |
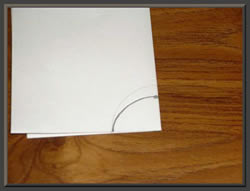 Fold the paper up again with the circle on the outside and freehand draw from one edge an arc as shown above. (Told you it was simple!!!) |
 With your knife or scissors, cut around the arc and then open out the oval. (Origami as well!) |
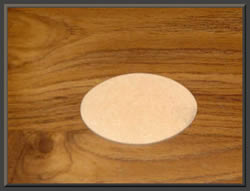 Use this paper template to cut one out of stiff cardboard or thin MDF as shown. (Note: the camera angle shows this oval to be shallower) |
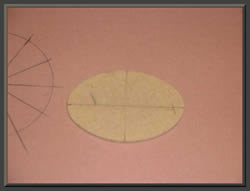 Mark the template along the long and short axis and make a reference mark on one segment to ensure it stays the right way round. |
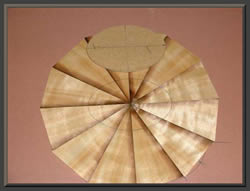
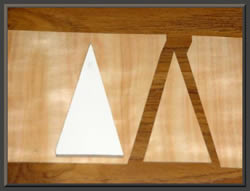 Now using your triangle, cut out 12 segments. Cut them all from the same leaf and same grain direction. |
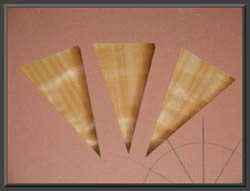 Keeping the segments all the same way round, sand shade one edge. Try to be as even as you can and don't burn the points! |
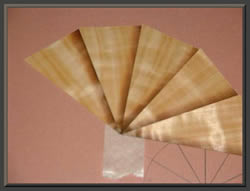 Using a piece of masking tape, start laying the segments paying particular attention to getting the points to meet exactly. Miss and your oval will be misshapen. |
 The last segment should fit exactly but don't worry if it is a gnat's whisker overlapping. Simply cut down the edge to take off the surplus. If you have a gap, worry and start again. Glue the segments. |
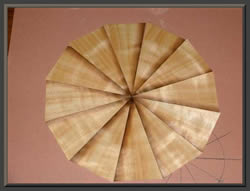
 Tape up the clean side as you will be cutting small sections across the grain. |
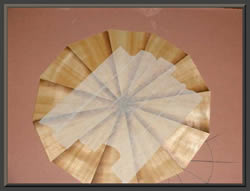
 Flip back to the "dirty side" and using your oval template, line it up using the drawn crosshairs against the segment joins and draw around the oval template. |
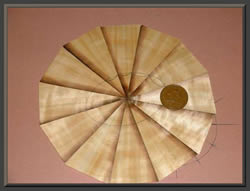 Take a suitable coin, in this a 2 pence piece but this will vary according to the size of your intended finished product. Working between the intersections between the pencil line and the segment join, draw a series of arcs. These will vary in size as you work around the oval. |
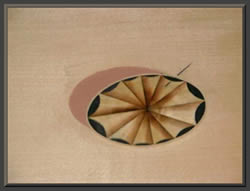
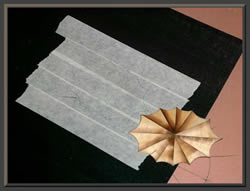 Cut out the design as shown above by following the drawn arcs. You might find it easier to use a series of stabs to follow the arc as the grain may catch you out. Tape up a piece of black treated veneer and using your design as a template, cut a window. The tape is used to show clearly where to cut. |
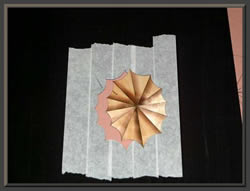 Now insert your design into the window and glue into place. |
 Using your oval template, locate it over the design (it should be just covering all of the points) and cut around the template. (The paper tape has been scraped away to show the result more clearly). |
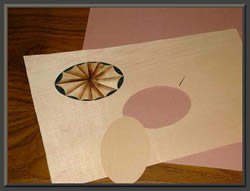 Use the oval template again to cut a window in a light piece of veneer and insert and glue the design. Remember to keep it the right way round at all times by marking a reference point with a pencil.. |
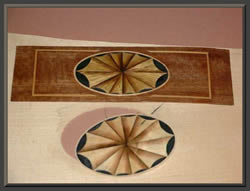
 Freehand, cut a border around your design and it is now ready to be mounted into your main veneer as shown in the next picture. |
 Well done!!!!! Alan Townsend - Chelmsford Marquetry Group |
Photography and script by Ted Higgs