|
 |
|
![]()
BORDERS
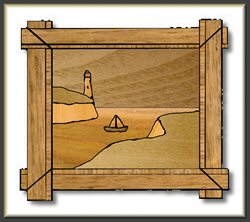
Once your picture has been created, the next phase is to frame it. While thinking about the options, things to be considered are: 1. would the picture look better without any further effects and laid as it is 2. what colour of border 3. what size of border 4. what style of border. If you decide that framing would improve your picture, then perhaps the following may be of help in deciding what to use as the border material. In the text which follows, ‘Border’ means the framing veneer; stringer means a thinner, complementary veneer inset for contrast. Framing increases the size of your picture - obvious perhaps, but this can make the final impression far more imposing. Is there a predominantly light or dark feeling to the picture, and would things be helped by complementing or contrasting this effect. For example, a picture containing a lot of walnuts and mahoganies will look browny red overall. To make a feature of this try picking it out by having a light border, such as sycamore. If this looks a bit plain, how about adding a thin stringer of walnut or sapele mahogany. If you have sufficient veneer available, by taping up two leaves at right angles they can be ‘offered up’ against the picture, and a feeling of whether or not it ‘looks’ right can be obtained. The ‘standard’ way of making up a border, once the material has been decided upon is to take our consecutive leaves and cut the borders from these. Use the first two leaves along the long edges and the other two along the shorter sides. Putting the veneer down this way you will create a matching effect top to bottom and side to side. There may be a change of colour depending on the direction from which they are viewed, as the light will be reflected off in different directions. If using this type of border, very pleasing effects can be obtained by insetting stringers at various points. The more usual is just a thin stringer between the main picture and the border; try also stringers 1/3 into the border, or giving a suggestion only by putting ‘corner’ stringers only. Another approach is to let the picture into a single piece of veneer or, if too large for this, then two leaves laid side by side, not matched. Another alternative for a border is to crossband, which means a striped veneer is laid with the grain direction going into the picture, and it tends to draw the eye into the picture. Striped veneers useful for this purpose include New Guinea walnut and sapele mahogany. Where the peculiar markings of a veneer are to be used to advantage, eight-piece matches are made, with corners being mirrored, and the four centres butt joined. This type is decorative with no illusion of solidity. It is usual to mitre corners on matched and cross banded borders. These should not necessarily be cut at 45 degrees, but rather on the line which joins the extreme corner of the board on which you will glue the picture. This should be a matter of design and not inaccuracy of working. Remember that if the edges of the baseboard are laid before the main picture they will be invisible when viewed from the front. If they are stuck on afterwards, there will be an obvious stripe around the edge. This is a point to bear in mind for all occasions, but particularly if one piece of veneer is to be used as a border and the veneer is going to be wrapped around the edges to get a more continuous effect. Cut and lay the edges first, before the main panel goes down. Be very careful not to cut too much for the edges and leave yourself short for the main border. If using a light border veneer, you can get a very pleasing effect by laying a dark veneer edge after gluing and trimming the border veneers - a thin dark line will show all round. Whatever order you choose to lay the borders and edges, it is normal practice to lay the back veneer first of all. The diagram shows the ‘standard’ way of making up the border using plain veneers and stringers. The edges of the picture will be laid using the same veneer as the border but stuck on using glue film strips. The edge veneer is laid on the board edge with a strip of glue film between it and the board. A hot iron is then judiciously applied, so as not to scorch, in order to melt the glue. When the glue bubbles at the edge, the iron is moved on until the whole edge is stuck. The edge is then trimmed and the other three edges are completed. |
||
 Border veneers and stringers fitted |
 Borders and stringers mitred |
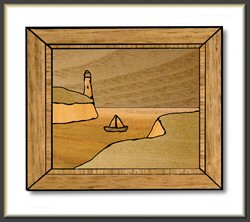 The "clean side" ready for laying |